With her bows almost out of the water, the Norwegian cruise liner Venus, of Bergen, makes a striking sight as she sits on the rocks of Dead Man’s Bay in Plymouth Sound. She arrived at Plymouth on 22 March 1955 from Madeira and Teneriffe, and after disembarking 25?passengers anchored inside the Breakwater to take on stores. During the night the wind veered to the south-west and increased to gale force, and early on the following morning she dragged her anchors and was blown ashore.

Coastguards fired a line over her, but those of the 15 crew who were not needed aboard were sent ashore in the ship’s boats. After a. number of un- successful attempts, the Venus was eventually towed off on the morning tide on 26 March and taken to Devonport Dockyard for temporary repairs. After major repairs in Holland she continued cruising until 1968, when she was broken up, for scrap. Owned by the Bergenske Steamship Co Ltd, she was built at Elsinore in 1931 with a gross tonnage of 5407, a length of 398 ft and a beam of 54 ft. She was a twin-screw vessel with four-cycle, 10-cylinder diesels of 9,550 bhp.


![The Captain ofHMS Kinbrace [left] standing next to the aide of the C in C Portsmouth and the Conunander in Chell [third from left] discussing the lift of HM Submarine XE8.](https://www.submerged.co.uk/wp-content/gfx/x/xcraft%201%20big.jpg "The Captain ofHMS Kinbrace [left] standing next to the aide of the C in C Portsmouth and the Conunander in Chell [third from left] discussing the lift of HM Submarine XE8.")


")


")


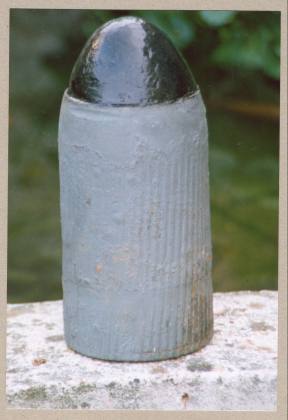
 aiming tube rounds. These solid lead shot are so common that my weight belt is made from them. It is less common to find a complete round with cartridge case still attached. Possibly ditched overboard as a miss fire. They were still in production well into the 1930's.")


 and 2 pdr.Pom Pom (bottom).")


